
Summary:
This guide helps maintenance engineers and plant teams quickly locate industrial gasket leaks, identify the real cause, and prevent repeat failures on flanges and equipment seals. It covers field inspection, common failure modes, corrective actions, and preventive maintenance.
Table of Contents:
How to Locate the Leak Point
5 Common Causes of Gasket Leaks
Systematic Field Inspection Process
Targeted Corrective Actions
Preventive Maintenance Measures
Frequently Asked Questions
Summary & Next Steps
1. How to Locate the Leak Point
First, determine whether the leak is from a flange joint or from an equipment sealing face.
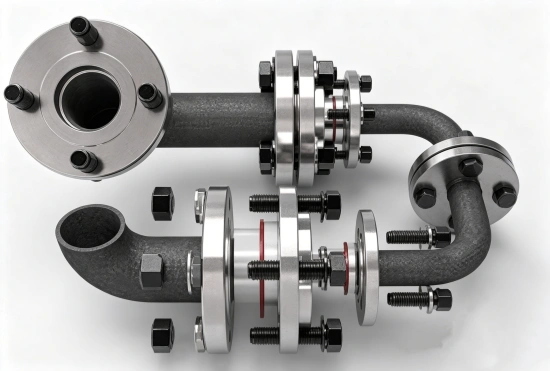
Flange leaks usually occur between two flange faces, where the gasket sits. Equipment sealing face leaks may appear on pump casings, valve covers, heat exchanger channels, reactor manways, or other non-standard flange areas. They look similar, but the repair approach differs.
Run the following checks in this order:
Visual inspection – Look for seepage, crystallization, rust, bubbles, or damp marks around the leak point. A wet ring around the outside of the flange gasket usually points to gasket failure.
Soap water test – For gas systems, spray soap water on the suspected area and watch for bubbles. This is one of the cheapest and most effective methods.
Ultrasonic leak detection – For high-pressure gas or steam systems, an ultrasonic detector can quickly locate leaks in noisy environments. It works well for large-area inspection.
Pressure decay test – Run a pressure-hold test on a closed system. Watch how fast pressure drops to confirm the leak and estimate its size.
Also check whether the leak is from the flange bolt holes, the outer edge of the gasket, or the weld between the flange and pipe. A wrong location call will lead the repair in the wrong direction.
Quick Tip: If the leak is on a standard flange, you can usually handle it in-house. If it is on a machined equipment sealing face, contact a sealing specialist before disassembly.
2. 5 Common Causes of Gasket Leaks
Once you find the leak point, don’t tear it apart right away. First identify the likely cause from these five categories.
2.1 Wrong Gasket Selection
The gasket material must match the medium, temperature, and pressure. For example, a standard rubber gasket in acid service, a PTFE gasket in high-temperature service, or a soft non-metallic gasket on a high-pressure flange. Wrong selection leads to rapid corrosion, softening, extrusion, or blowout.
2.2 Bolt Preload Problems
Low torque means the sealing face cannot develop enough gasket seating stress. Uneven torque leaves one side tight and the other loose. Bolt creep and relaxation reduce preload over time. Any of these can cause local loss of gasket stress and leakage.
2.3 Damaged Flange Faces
Scratches, pits, corrosion marks, or radial damage on the flange sealing face prevent the gasket from seating fully. Even a new gasket will leak through the damaged area.
2.4 Gasket Aging and Compression Set
Under high temperature or cyclic loading, a gasket gradually loses recovery and takes a permanent compression set. Wrong size, over-compression during installation, or reuse of old gaskets also speeds up aging and failure.
2.5 Thermal Cycling and Vibration
Repeated temperature swings cause different thermal expansion in the flange, bolts, and gasket. This creates preload fluctuation. Mechanical vibration gradually loosens bolts. Together, they often lead to micro-leakage at the sealing face.
Quick Takeaway: Most flange gasket leaks are caused by wrong gasket selection, insufficient bolt preload, damaged flange faces, gasket aging, or thermal cycling. Always confirm the root cause before replacing the gasket.
3. Systematic Field Inspection Process
After locating the leak and forming an initial cause hypothesis, follow these five steps. This avoids missing key information or making a wrong judgment.
Step 1: Record the Leak Location, Medium, Temperature, and Pressure
Before any intervention, record the exact leak point, equipment, fluid phase (liquid or gas), operating temperature, operating pressure, and leak rate or volume.
Step 2: Check Flange Face Condition and Bolt Torque
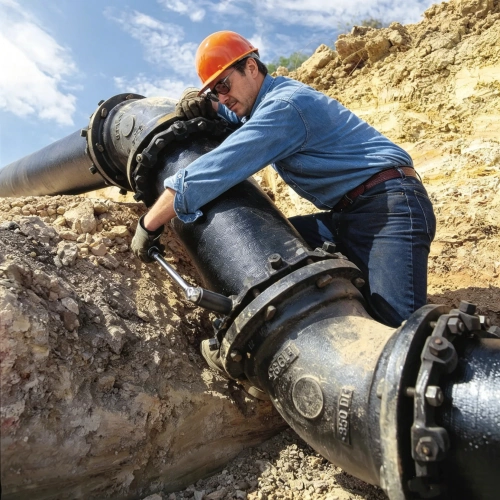
Once the area is confirmed safe, inspect the flange outer surface for visible deformation, corrosion, scratches, or sealing face damage. Use a calibrated torque wrench and follow the specified tightening sequence to check residual torque on each bolt. Note whether torque values are clearly below specification or whether bolt-to-bolt variation exceeds the allowable range. This tells you if preload is still sufficient for sealing.
Step 3: Check Whether the Gasket Type and Material Suit the Operating Conditions
Review maintenance records or inspect the removed gasket. Verify the material, type, and nominal size against the design documents. Considering the actual operating conditions, determine whether medium corrosion, temperature overrun, or pressure spikes caused the gasket failure.
Step 4: Check Installation Records and Maintenance History
Pull the installation and repair records for this flange or sealing point. Confirm when the gasket was last replaced, what tools were used, what torque was actually applied, and whether similar leaks have occurred before. Repeated leaks at the same location usually point to a systematic problem in installation or gasket selection, not a one-off event.
Step 5: Combine the Findings and Determine the Root Cause
Summarize the information from the first four steps. For example, if residual bolt torque has dropped by 40% and the system operates with temperature swings, thermal relaxation is a likely cause. If the old gasket is standard rubber and the medium contains solvents, chemical incompatibility is likely. Only after the root cause is confirmed can corrective actions be effective and prevent the leak from returning.
Need help with gasket selection? Download our [Gasket Selection Checklist] or contact our sealing engineers. (Replace with actual link to download or contact page)
4. Targeted Corrective Actions
Once the root cause is confirmed, apply the matching corrective action. Do not blindly add bolt torque or replace the gasket without knowing the cause. These actions may stop the leak for now, but they will not remove the failure source. The problem will likely return soon.
| Root Cause | Typical Sign | Corrective Action |
| Wrong gasket material | Swelling, softening, chemical attack, extrusion | Re-select gasket based on medium, temperature, and pressure. Upgrade to spiral wound, camprofile, or metal ring if needed. |
| Low or uneven bolt torque | Leak on one side, uneven compression, loose bolts | Re-tighten in stages with calibrated wrench. Perform hot torquing on high-temperature systems. |
| Damaged flange face | Leak path across radial scratches, pitting | Field lap or machine the flange face. Replace if damage exceeds allowable limits. |
| Gasket aging / compression set | Hardening, permanent deformation, loss of recovery | Replace gasket. Set a preventive replacement interval. |
| Thermal cycling / vibration | Intermittent leak, bolts loosening over time | Use high-recovery gasket, controlled tightening, and vibration-resistant bolting. |
Detailed Actions
4.1 Selection Problem → Re-select the Right Gasket Material and Type
Recheck the gasket selection against the actual medium, temperature, and pressure. If necessary, upgrade to higher-grade gaskets such as spiral wound, camprofile, or metal ring gaskets. Never substitute gaskets on site. Material and type must meet the design requirements. No “close enough” replacements based on experience.
4.2 Torque Problem → Re-tighten to Specification and Ensure Even Loading
Use a calibrated torque wrench. Tighten in stages — usually 3 to 4 passes — following the standard sequence. Never fully tighten one side in one pass. For high-temperature service, perform hot torquing after the system reaches operating temperature to make up for preload loss from thermal expansion.
4.3 Flange Face Problem → Repair or Replace the Flange; Field Machine if Needed
Minor scratches or corrosion can be handled by on-site lapping or flange repair tools. If damage depth exceeds the allowable limit, machine or replace the flange. After repair, check flatness and surface roughness to ensure the sealing face meets requirements.
4.4 Aging Problem → Replace the Gasket and Record the Replacement Interval
Removed gaskets should generally not be reused. Before installing a new gasket, verify its size and material. Avoid mechanical damage during installation. After replacement, record the date and operating conditions. This data supports a reasonable replacement interval.
5. Preventive Maintenance Measures
Fixing the leak is the short-term goal. The long-term goal is to prevent the same failure from happening again. Build a preventive management system in four areas.
5.1 Set Gasket Selection Standards
Create written guidelines for gasket material and type based on equipment, medium, temperature, and pressure. Purchasing and site use must follow these guidelines. No random substitution. Make sure the gasket matches the service conditions.
5.2 Standardize Installation Procedures and Torque Control
Prepare a flange installation work instruction covering bolt cleaning, lubrication, tightening sequence, and target torque. Torque wrenches must be calibrated on schedule. Critical equipment should have a two-person verification system. This keeps installation quality traceable and reduces human error.
5.3 Schedule Routine Inspection and Condition Monitoring
Set inspection plans for key flanges and sealing points. Perform visual checks and keep records. Where possible, use infrared thermal imaging, ultrasonic leak detection, or other online monitoring tools to identify early micro-leaks. Shift from reactive repair to proactive maintenance.
5.4 Keep Gasket Usage and Maintenance Records
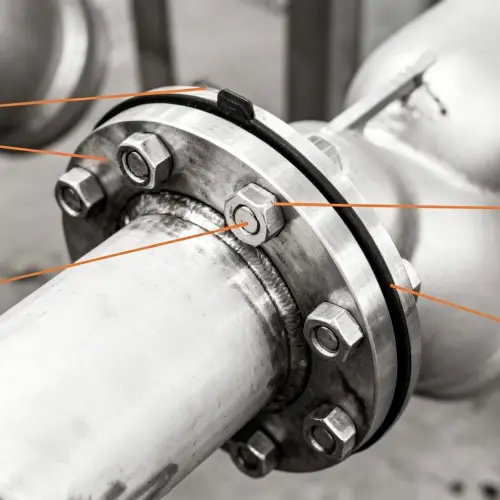
For every gasket replacement, record the installation date, gasket material, size, bolt torque, operator, and operating conditions. Data analysis can reveal the leak cycle and help optimize preventive maintenance plans, reducing unplanned downtime.
What not to do:
Do not reuse old gaskets
Do not overtighten bolts to stop a leak
Do not substitute gasket materials on site
Do not ignore repeated leaks at the same location
6. Frequently Asked Questions
Q1: How is gasket leakage related to bolt torque?
A gasket seals because bolt preload compresses it between the flange faces. If torque is too low or uneven, the gasket cannot reach the required seating stress. The medium then leaks from the low-pressure area. But higher torque is not always better. Too much torque can crush the gasket or deform the flange.
Q2: How can I tell if a gasket is selected incorrectly?
Look at the removed gasket. If it shows swelling, softening, cracking, hardening, extrusion, or reaction with the medium while operating conditions are normal, the material is likely wrong. Compare the gasket with design documents and actual service conditions to confirm.
Q3: Can minor flange face damage be repaired in the field?
Yes. If radial scratches are shallow and corrosion pits are not deep, use lapping tools or a flange facing machine on site. After repair, check flatness and roughness. If the damage is severe and affects sealing width or flange strength, the flange must be replaced or sent back for machining.
Q4: What is the typical service life of different gasket materials?
There is no single answer. Non-metallic gaskets in normal service may last 1–3 years. Spiral wound gaskets can last 3–5 years or longer. Actual life depends on temperature, pressure, medium corrosiveness, preload maintenance, and operating stability. Record replacement dates and use inspections to set a realistic interval.
7. Summary & Next Steps
An industrial gasket leak is not the real problem. The real issue is replacing the gasket without tracing the failure cause. That leads to repeated leaks with no identified root cause.
The systematic approach is simple: locate the leak point, match it against common cause categories, collect operating and installation information step by step, and apply the right fix after the root cause is confirmed. Selection, installation, and maintenance all matter. Correct gasket selection is the foundation of sealing reliability. Proper bolt preload control is the key. Regular condition inspection keeps long-term operation stable.
If you follow this process and still cannot identify the leak cause, or if site conditions are complex and risky, contact a qualified gasket supplier or equipment engineer. Do not keep trying repairs based on guesswork. Delaying the right action can cause much larger losses.
Need help with flange gasket selection or troubleshooting? Talk to our sealing engineers for a free technical consultation.
