
Circular sight glasses are a common sight in industrial piping, pressure vessels, and reactors. When you’re figuring out how to install circular sight glass correctly, the payoff is huge: no leaks, no stress cracks, and a much longer service life. This guide walks you through the entire process, from prep work to final checks.
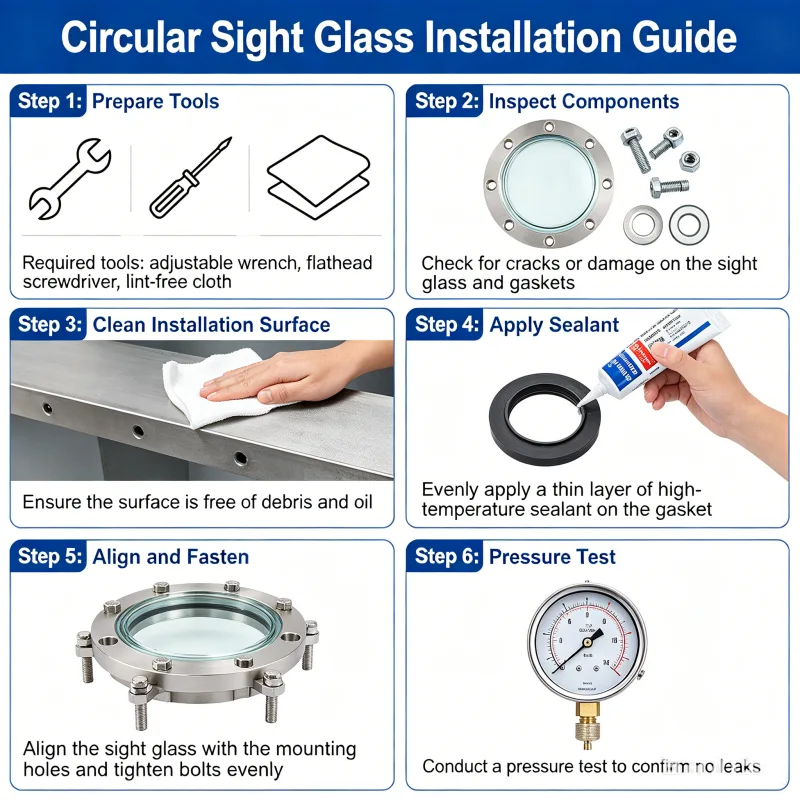 1. Pre-Installation Preparation
Before you touch a single bolt, give the sight glass a careful once-over. Look for cracks, scratches, or chipped edges—any of these will spell trouble under pressure. Gather everything you’ll need: the matching flanges, the correct sealing gaskets, and a set of standard bolts. Now, focus on the flange faces. They must be absolutely clean, smooth, and free of any dirt, rust, or old gasket material. This step matters more than most people think.
2. Step-by-Step Installation
Start by laying the sealing gasket flat into the flange groove—no twists or kinks. Then position the circular sight glass gently in the center, making sure it sits evenly without any tilt. Align the upper and lower flanges carefully; misalignment here is a direct invitation for leaks. Insert the fixing bolts and run them down finger-tight to hold everything in place.
Now comes the critical part: tightening. Always use a diagonal (star-pattern) tightening sequence. Build up the torque in stages—say 30%, 60%, then full torque—working your way around the flange. Never fully tighten one side while the opposite side is still loose. This balanced, staged approach prevents uneven compression and keeps the glass stress-free.
3. Important Do’s and Don’ts
-
Never strike or bump the glass surface with hard objects. A single tap can create micro-fractures you won’t see until it’s too late.
-
Don’t force a misaligned assembly into place. If something doesn’t fit, stop and realign it.
-
Stay away from gaskets that are the wrong size, dried out, or deformed. A cheap gasket is the most expensive shortcut you can take.
-
Avoid twisting or prying the glass during installation. This introduces internal stress that can cause sudden failure down the road, even under normal operating conditions.
4. Post-Installation Checks
Once everything is bolted up, perform a static leak check. Look for any sign of fluid escape or gasket displacement. Next, run the equipment briefly at operating pressure and inspect the sight glass again—watch for water leaks or internal fogging. If everything stays clear and dry, you’re good to go.
Taking the time to follow a solid circular sight glass installation guide isn’t just about ticking a box; it’s about keeping your process running safely and reliably. Now that you know exactly how to install circular sight glass the right way, you can avoid the common pitfalls that lead to cracked glass and messy leaks.